Changing a cassette on a bike equipped with a Shimano Hyperglide system involves several steps. Here’s a detailed guide to help you through the process:
### Tools Needed:
1. **Cassette lockring tool**: Make sure it’s compatible with Shimano cassettes.
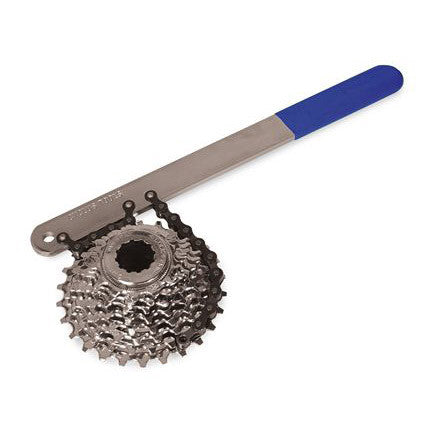
2. **Chain whip**: To hold the cassette in place while loosening the lockring.
3. **Adjustable wrench** or **socket wrench**: To turn the lockring tool.
4. **Bike stand** (optional): To keep the bike steady.
### Steps:
1. **Prepare Your Bike**:
- Shift the chain onto the smallest chainring in the front and the smallest cog in the rear. This gives you the most slack in the chain and makes it easier to remove the wheel.
2. **Remove the Rear Wheel**:
- Open the quick release lever or unscrew the axle nuts to remove the rear wheel from the bike.
3. **Remove the Old Cassette**:
- **Insert the lockring tool**: Fit the lockring tool into the lockring of the cassette.
- **Position the chain whip**: Wrap the chain whip around one of the larger cogs to prevent the cassette from spinning.
- **Loosen the lockring**: Use the adjustable wrench or socket wrench on the lockring tool to turn it counterclockwise while holding the chain whip in place. Once the lockring is loose, you can remove it by hand.
- **Remove the cassette**: Slide the cassette off the freehub body. Some cogs might come off separately, so be careful not to lose any spacers.
4. **Clean the Freehub** (optional but recommended):
- Wipe down the freehub body with a clean cloth to remove any dirt or old grease.
5. **Install the New Cassette**:
- **Align the cogs**: Notice the spline pattern on the freehub and the matching pattern on the cassette cogs. There is usually one wider spline that ensures the cassette is aligned correctly.
- **Slide on the cogs**: Install the new cassette onto the freehub body, ensuring each cog fits properly onto the splines. If your cassette has separate spacers, place them in the correct order.
- **Install the lockring**: Thread the lockring onto the freehub body by hand to avoid cross-threading. Tighten it by turning clockwise.
6. **Tighten the Lockring**:
- Use the lockring tool and wrench to tighten the lockring to the manufacturer’s recommended torque specification, usually around 40 Nm. If you have a torque wrench, this is the time to use it.
7. **Reinstall the Rear Wheel**:
- Place the rear wheel back onto the bike, ensuring it’s properly seated in the dropouts.
- Tighten the quick release lever or axle nuts securely.
8. **Check and Adjust**:
- Spin the wheel and check that the cassette is running smoothly.
- Shift through the gears to ensure everything is aligned and functioning properly. You may need to adjust the derailleur slightly to accommodate the new cassette.
### Tips:
- It’s a good idea to replace your chain when you
change the cassette, especially if the old cassette and chain were worn. A new cassette with an old, stretched chain can lead to poor shifting performance and accelerated wear.
- Keep your workspace organized by laying out the new cassette in the correct order before installation.
- If you're unsure about the torque specifications, check Shimano's technical documentation for your specific cassette model.
### Troubleshooting Common Issues:
1. **Cassette Won’t Slide On**:
- Ensure you’re aligning the splines correctly. The wider spline should match up with the wider gap on the freehub body.
2. **Skipping Gears**:
- This might indicate that the derailleur adjustment is off. Fine-tune the derailleur’s limit screws and indexing using the barrel adjuster.
3. **Noisy Drivetrain**:
- Check that the lockring is tightened to the correct torque. Also, ensure the chain is properly lubricated.
By following these steps, you should be able to successfully change your Shimano Hyperglide cassette and enjoy smooth, reliable shifting on your rides. If you encounter any issues or are unsure about any step, consider seeking assistance from a professional bike mechanic.
